
Tutorial // Junkrat's Prosthetic Peg Leg
August 04, 2016 |
| Photo: Cliff N. |
I've received countless messages regarding how I made one of the most intimidating components of this Overwatch cosplay. I'm not an amputee, I'm not an insanely dedicated cosplayer- I'm just someone who likes to think outside of the box a bit. While researching how to complete this uber-daunting task, I realized that many of these tutorials required tools that I just couldn't afford, or techniques that I didn't have time to perfect.
With the con a little under one week away, I took procrastination to a new level. After some quick-thinking and creativity, I'm proud to say that I somehow managed to pull it off! This Junker was ready to roll, complete with my very own peg leg. This cosplay is still certainly not anywhere near "done" for me- I plan to build Jamison's frag launcher and possibly rip-tire (as well as finishing up some additional details on the costume) by the time Comikaze Expo rolls around. On to the tutorial!

Recommended materials:
- PVC pipe/toilet plunger handle (I'm not cheap, I'm "resourceful")
- EVA/craft foam
- HDMI cable (try a dollar store)
- Contact cement/hot glue
- X-acto knife
In short, Junkrat's prosthesis is simply layering cuts of craft foam, adding a cable to create the "spring", and ensuring that the top of the leg has enough of a surface area to rest your kneecap on. I approached the task in this particular order:
- Create a cone shape at the top of the base, filling with padded EVA foam, adhering with contact cement
- Pattern out the raised levels of craft foam to create dimension
- Dremel small holes to create indented metal bit attachments
- Cut two double-beveled pieces of EVA foam strip measuring to the circumference of the leg. Place these at the top and bottom of the spring area, sectioning it off
- Hot glue/contact cement combination of gluing an old HDMI cable, wrapping around and securing ends at the back of the leg-facing
- Layer two strips of craft foam at the bottom of the leg, as well as a circle cut-out to glue to the very bottom/underside of the leg (this will give a bit of traction and stability)
- Cut three pieces of beveled EVA floor mat foam, add contact cement and dremel details to create the orange top-most 'hinge' part of the prosthesis. I glued this straight onto my shorts because why not? I was out of time and had to work with what I brought to our hotel haha.
- Prime every single last thing. Paint two coats with pigmented acrylics, weather as desired, and seal. I used a matte modge podge for both because I'm on a budget, and it does the job. I would highly recommend both the Plasti-dip Primer and Sealer.
The "magic" of the leg comes with the pose- by adding a solid foundation of EVA foam in a cone shape, you'll essentially create a landing platform at the top of the leg to carry both the weight of your body, and prevent you from losing balance. This prop is photo ready- meaning that it's only meant for posing for quick photos, not for walking around the con all day. Designing with that in mind, means that you can easily pop the leg into a backpack or just carry it around throughout the day- it's incredibly lightweight, can be tossed around, and has a 99.99% of not breaking down. Simply prop the peg leg onto a flat surface, use your core to keep a steady balance, rest your knee on the platform, and strike a pose!
I also recommend wearing black leggings, black socks, and a comfy black shoe to draw less attention to your leg in case it does accidentally peek out from behind your thigh. Be sure to try and ask photographers to snap their photos from dead center, right in front of you- once you drop your prop down, most will understand what you're going for. Congrats, you've just learned how to become Junkrat!
I also recommend wearing black leggings, black socks, and a comfy black shoe to draw less attention to your leg in case it does accidentally peek out from behind your thigh. Be sure to try and ask photographers to snap their photos from dead center, right in front of you- once you drop your prop down, most will understand what you're going for. Congrats, you've just learned how to become Junkrat!
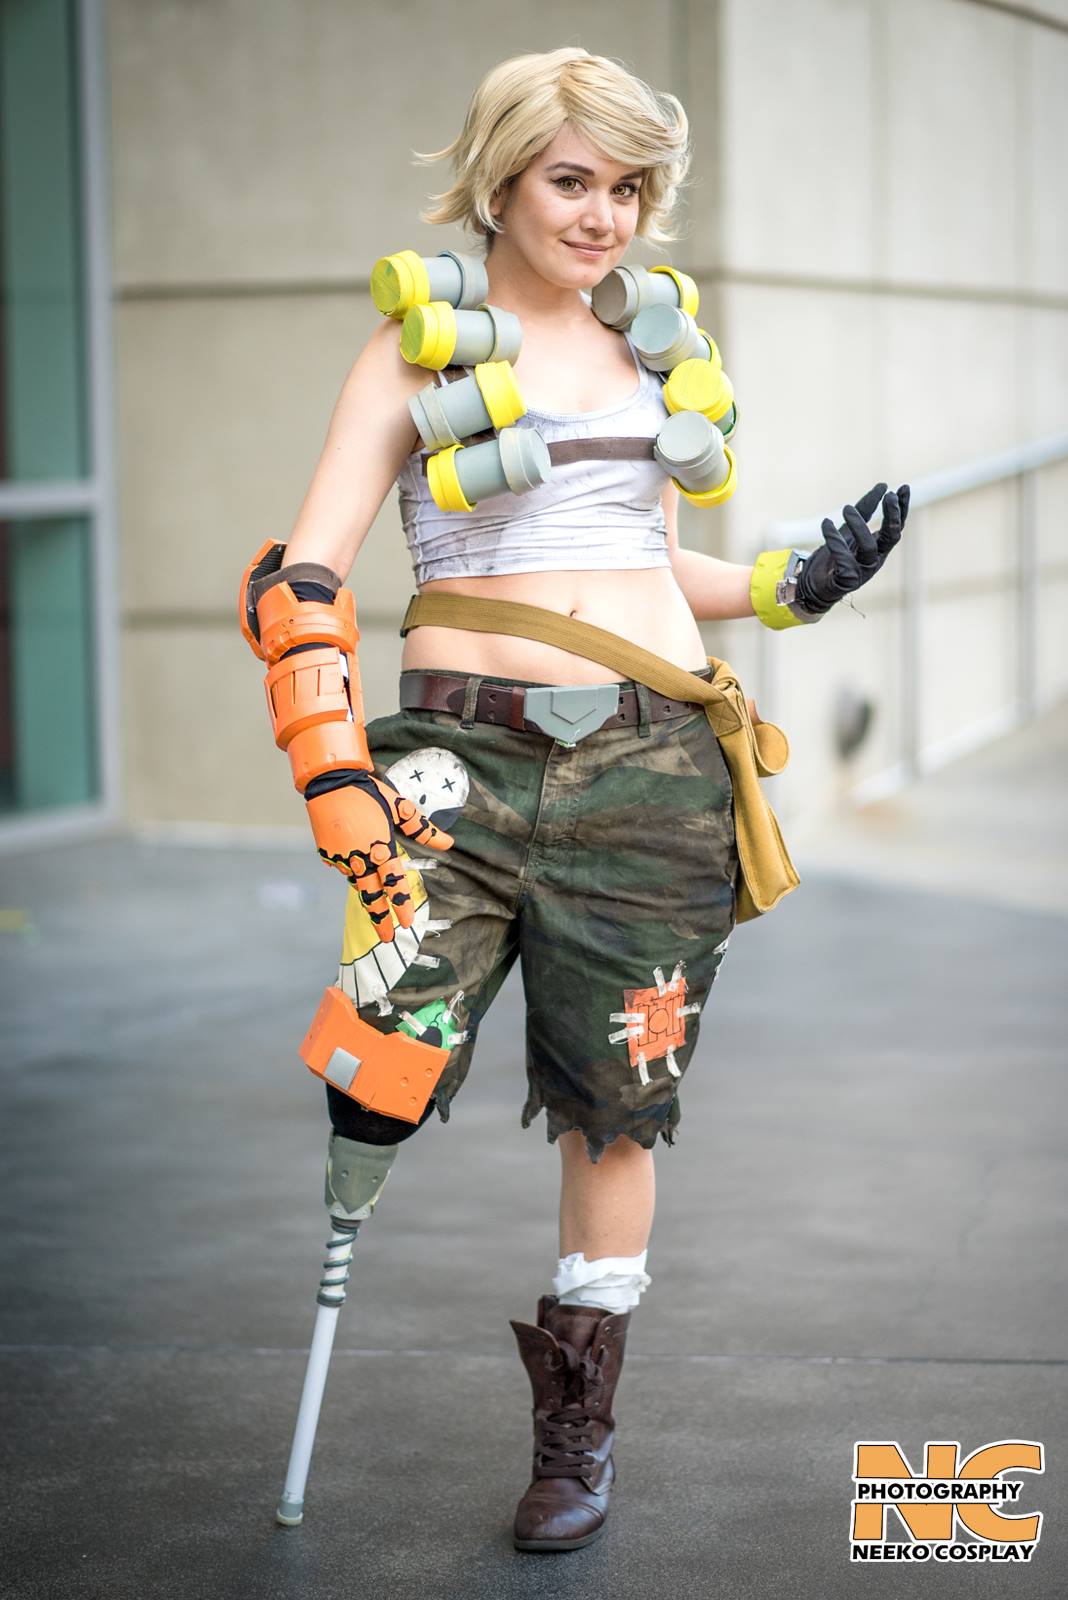 |
| Photo: Neeko Cosplay Photography |
Additional photos: Tumblr + Instagram
Posing process video: Tumblr
Additional foam basics: TheEvilTed Channel


0 comments